Pour Over Coffee Ratio Guide: Golden Ratios, Brewers and Gear for 2026
Getting the pour over coffee ratio right gives you more control over how a cup tastes than any other single change you can make.
Pour Over Coffee Ratio Guide: Golden Ratios, Brewers and Gear for 2026
Getting the pour over coffee ratio right gives you more control over how a cup tastes than any other single change you can make. Grind size, water temperature and pouring technique all matter, but a wrong coffee-to-water ratio cannot be rescued by a perfect spiral pour. This guide collects the ratios that the Specialty Coffee Association and working roasters actually publish, converts them into grams for the brewers people buy, and looks at the small set of tools that make those numbers repeatable morning after morning.
One framing point before anything else, because it trips up more brewers than any other: every ratio here is grams of coffee to grams of water poured, and the bloom water counts. It is not a beverage yield. The ratio you write down is an input ratio — what goes into the brewer — not what ends up in your mug.
Everything below is desk research: manufacturer specification sheets, published roaster recipes, named expert publications and aggregated owner feedback from forums and Reddit’s r/coffee. Nothing here comes from in-house laboratory testing. Prices are approximate, they come from UK sellers, and they move constantly between retailers.
Quick picks
| Product | Best for | Approx. UK price |
|---|---|---|
| Hario V60 Ceramic 02 | Best all-round dripper | around £25–£35 |
| Hario V60 Plastic 02 | Cheapest route into the same recipes | around £10–£15 |
| Timemore Black Mirror Basic 2 | Best-value ratio scale | around £45–£55 |
| Fellow Stagg EKG | Best gooseneck kettle | around £155–£175 |
How to choose a pour over ratio — and the gear that makes it repeatable
Ratio sets strength; grind and contact time set extraction
Speciality coffee separates two things that a brew ratio is often blamed for. The ratio controls strength — how concentrated the finished cup is. The grind and contact time control extraction — how much of the coffee’s soluble material actually ends up dissolved in the water. These are independent, which is why you can brew a technically well-extracted coffee that still tastes thin because you used too much water, or a rich, syrupy cup that tastes muddy because you used too little.
That distinction is why the ratio is the cleanest single adjustment available to a home brewer: it shifts strength without touching grind, and it is measurable to the gram. As Counter Culture Coffee’s pour over guide sets out, manual brewing gives you more control over individual variables than machine brewing does, and lets you brew exactly the amount you need — so the coffee is as fresh as possible and less is wasted. The ratio is simply the variable with the largest effect and the smallest margin for error.
Input ratio versus output ratio: why your mug is never full
Coffee grounds retain water. Barista Hustle’s extraction and TDS primer puts the figure at roughly two times the dry coffee weight — and, importantly, expresses it as a range of about 1.5× to 2.5×, depending on grind fineness and brewer geometry. A finer grind and a deep cone bed hold more; a coarse grind in a shallow flat bed holds less.
That is why the spine of this guide’s ratio table is headed “Water poured (g)” rather than “water in the cup”. As a working example, 250 g of water poured over a 15 g dose leaves approximately 220 g in the mug. The 30 g difference is the water still sitting in the bed, and it is the reason a 1:16 brew never fills a 250 ml cup to the brim. The 1.5×–2.5× range means the real figure can shift by tens of grams either way, so treat every yield column as approximate.
What the SCA Golden Cup Standard actually specifies
The Specialty Coffee Association’s published Golden Cup Standard is the reference document most often misquoted in ratio debates. Its targets are:
- 1.15–1.35% TDS (total dissolved solids — the share of the brewed liquid made up of dissolved coffee)
- 18–22% extraction yield (the share of the dry coffee mass that dissolved into the water)
- Brew strength of approximately 50–60 g/L, ±10%
In coffee-to-water terms, 50–60 g/L is roughly 1:18 to 1:16.7. That matters, because the SCA band is frequently described as the opposite of modern speciality practice — it isn’t. It sits squarely inside the working band most speciality brewers use, which is 1:15 to 1:18. The overlap is real; 1:18 is the light end of that band, not a rival philosophy.
Water temperature: 92–96 °C
The SCA recommends 92–96 °C (195–205 °F). The reason this sits in a ratio guide is that the two variables interact: hotter water plus a tight, coffee-heavy ratio pushes extraction upwards, and the cup tips from sweet into harsh and drying. If you are deliberately brewing strong at something like 1:14, keeping the kettle at the lower end of that range is the cheapest insurance against a bitter result.
How the gear in this guide was selected
These three picks were selected on published manufacturer specifications, UK availability, and owner-review patterns at UK coffee retailers and on r/coffee — not on any hands-on testing. Where a figure is quoted below, it is either the manufacturer’s own stated specification or a named publication’s data.
Pour over ratio table: grams of coffee to grams of water
Two columns matter here. “Water poured” is the total including the bloom. “Yield in cup” subtracts the roughly 2× dry-weight retention described above at a 15 g dose — approximately 30 g — so treat it as a guide, not a measurement.
| Dose (g) | Ratio | Water poured (g) | Yield in cup (approx.) | Character |
|---|---|---|---|---|
| 15 g | 1:14 | 210 g | approx. 180 g | Strong, dense |
| 15 g | 1:15 | 225 g | approx. 195 g | Full-bodied |
| 15 g | 1:16 | 240 g | approx. 210 g | Balanced default |
| 15 g | 1:17 | 255 g | approx. 225 g | Lighter |
| 15 g | 1:18 | 270 g | approx. 240 g | Lightest, SCA-adjacent |
| 30 g | 1:16 | 480 g | approx. 420 g | Two mugs |
The grams-per-litre shortcut
If juggling ratios is annoying, flip the maths and think in grams of coffee per litre of water:
- 1:14 → 71 g/L — strong; V60 and Kalita territory
- 1:15 → 67 g/L — full-bodied
- 1:16 → 62.5 g/L — the default; equivalent to 15.6 g for a 250 g brew
- 1:18 → 55.6 g/L — the SCA Golden Cup region, commonly rounded to 55 g/L
Note that last one carefully: 1:18 is approximately 55.6 g/L, not 55. The two figures are the same number rounded differently, and quoting one as a correction of the other is a common error in ratio threads.
Where 1:16 comes from
The most widely repeated starting point in speciality coffee is 1 part coffee to 16 parts water by weight. It is not a law, it is a centre of gravity. Nearly every major UK roaster’s published recipe sits within a part or two of it, including Has Bean, Square Mile, Monmouth, Workshop and Ozone. That convergence is the strongest evidence for 1:16 as a starting point: five independent roasting companies, with different green buying and different roast profiles, have all landed in the same neighbourhood. There is no single “best” recipe in pour over — only a starting point you then adjust.
Dialling in: four taste problems and the one change that fixes each
This is the part most ratio guides skip, and it is where a number becomes a decision. Diagnose first, then change one variable at a time.
Sour or thin. Tighten the ratio (more coffee for the same water), grind finer, and use hotter water. Sourness points to under-extraction, and thinness to low strength — both are moving in the wrong direction at once, so all three levers apply.
Bitter or hollow. Loosen the ratio (more water for the same coffee), grind coarser, and cool the water towards the lower end of the SCA range. Bitterness and a drying, empty mid-palate are the signatures of over-extraction.
Weak but balanced. Tighten the ratio only. The extraction is fine — the flavour is all there, just diluted — so grind and temperature stay exactly where they are.
Muddy or rich. Loosen the ratio only. You have enough flavour and too little water; adding more water fixes strength without disturbing a good extraction.
The reason to start with the ratio rather than the grind is that one is measurable and the other is not. Moving from 1:15 to 1:16 is a change you can state in grams; “a bit coarser” is not.
The gear: reviews
Hario V60 Ceramic 02 — best all-round dripper
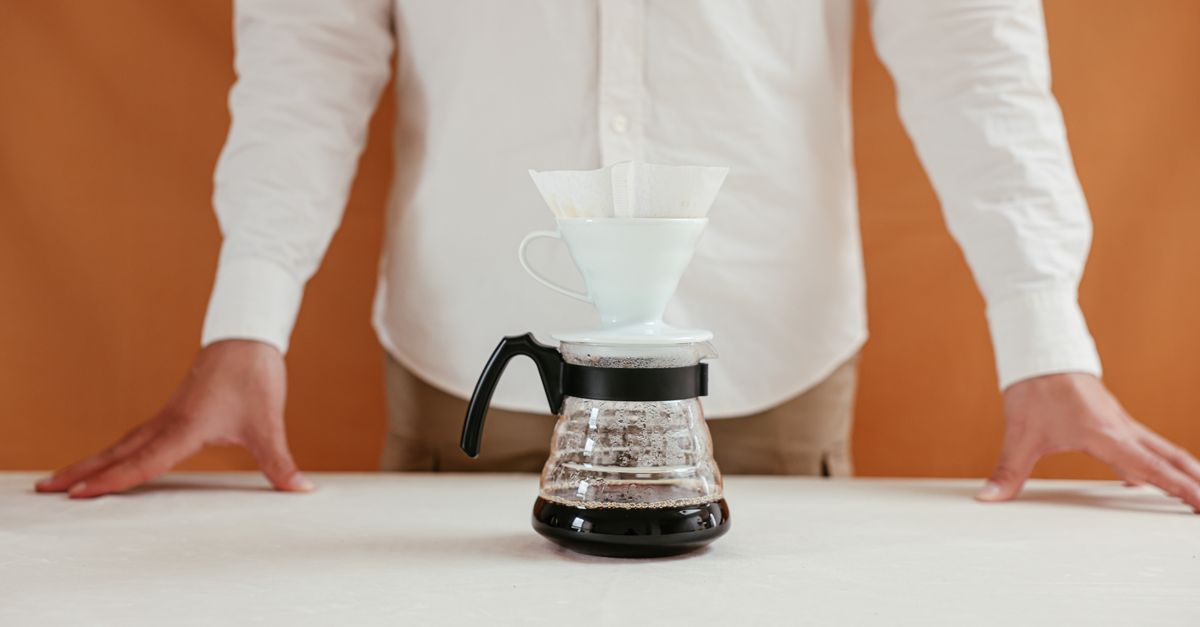
Best for: anyone who wants the largest published recipe library behind them. The V60 is the most widely documented pour over brewer there is, which means more recipes to copy, more troubleshooting threads to search, and more roaster-published ratios to compare against.
What you get: the 02 size cone, and compatibility with the standard V60 paper range — the same filters fit both the ceramic and plastic versions of the 02. Approximately £25–£35.
Standout strength: the recipe ecosystem. If a UK roaster publishes a pour over method, it is very often a V60 method, and the ratio in that recipe transfers directly.
Honest caveat: the V60 is not the easiest brewer to dial in, despite being the most popular. It drains fast, and a fast-draining cone responds sharply to every change you make — grind, pour rate and water level all show up in the cup immediately. That makes it rewarding for someone adjusting ratios deliberately, and unforgiving for someone pouring without a plan. The ceramic body also needs preheating so it does not pull heat out of the slurry.
Verdict: the right first dripper if you want the most documented ratios to work from, provided you accept that it will tell you the truth about your technique.
Hario V60 Plastic 02 — the budget route into the same recipes
Best for: brewers who want the V60’s recipe library without spending ceramic money.
What you get: the same 02 cone geometry and the same papers as the ceramic version. Approximately £10–£15 — roughly half the price of the ceramic, or less.
Standout strength: identical filter fit and the same published recipes, at the lowest entry price in this guide.
Honest caveat: the trade-off is thermal mass. A ceramic cone requires preheating; a plastic one does not hold heat the same way and behaves differently in that respect. If temperature stability is the thing you are chasing, that difference matters more than the price saving.
Verdict: the cheapest sensible way to start brewing 1:16 in a V60 — just know what you are giving up.
Where to buy: the V60 range is typically stocked by UK speciality coffee retailers and general kitchen and homeware sellers; prices vary considerably between them, so it is worth comparing before buying.
Timemore Black Mirror Basic 2 — best-value ratio scale
Best for: anyone who has decided to brew by weight and needs the two features that actually matter, without paying for the ones that don’t.
What you get: a 0.1 g resolution readout and a built-in timer, so you can weigh the dose and water while timing the pour from one device. Approximately £45–£55.
Standout strength: resolution and timing, which is precisely what ratio work requires. Without a scale, a “15 g dose” is a guess; with one, it is 15.0 g and your ratio is real.
Honest caveat — and read this one carefully: 0.1 g resolution is not the same thing as 0.1 g accuracy. Resolution is the size of the smallest step the display shows; accuracy is how close that reading is to the true weight, and Timemore specifies the two separately on its own specification sheet. Check both numbers rather than assuming the finer-looking one implies the other. The Black Mirror Basic 2 also has no flow-rate display, so if you want to monitor pour speed in grams per second, this is not that scale.
Verdict: the value pick for ratio brewing — buy it for the resolution and the timer, and verify the accuracy spec yourself.
Where to buy: scales in this class are typically sold through UK coffee equipment specialists and larger online marketplaces; stock and pricing shift frequently.
Fellow Stagg EKG — best gooseneck kettle
Best for: brewers who want the pour itself to stop being a variable, and who want to hold a specific temperature rather than guess at it.
What you get: the manufacturer states ±1 °C temperature accuracy and a 60-minute hold function, plus the slow, steady gooseneck spout that makes a controlled, even pour possible. Approximately £155–£175.
Standout strength: degree-accurate temperature control and a hold long enough to cover a full session of dialling in. Because the SCA range is 92–96 °C — a four-degree window — a kettle that lands within a degree of your target makes that window something you can actually work inside rather than approximate.
Honest caveat: it costs several times what a basic variable-temperature kettle does, and it will not fix a bad ratio. It removes a variable; it does not choose your numbers for you.
Verdict: the kettle to buy if precise temperature and a controlled pour are the two things standing between you and repeatable cups.
Where to buy in the UK: the Stagg EKG is typically available from Amazon UK, Has Bean, Coffee Hit, Bella Barista and Dog & Hat. Prices move between sellers, so it is worth checking more than one before ordering.
FAQ
Does the bloom water count towards the ratio? Yes. Bloom water is part of the total water poured, and it is included in every ratio in this guide. If you bloom a 15 g dose with 45 g of water and then pour another 195 g, your ratio is based on 240 g total, not 195 g. Excluding the bloom is one of the most common causes of a brew that reads weaker than the recipe promised — you have effectively brewed a looser ratio than you intended.
How much coffee do I need for one mug? At 1:16, a 250 g pour needs approximately 15.6 g of coffee, and it will leave roughly 220 g in the mug once the bed has retained its share. If you want a fuller mug, adjust the dose rather than the ratio first — 18 g at 1:16 gives you 288 g of water poured and a noticeably larger drink without changing the flavour balance you have already dialled in.
Can I just use tablespoons instead of weighing? No, and this is where volume measuring falls apart. Barista Hustle’s density data shows that a tablespoon of coffee varies materially with roast level and grind setting — a dark, coarsely ground coffee and a light, finely ground one will not weigh the same in the same spoon. Because the whole point of a ratio is precision to the gram, a scoop that drifts by several grams per dose makes the number meaningless. If you take one thing from this guide, take this: weigh the coffee.
What ratio should I use for iced pour over? Iced pour over typically runs at 1:12 to 1:13, considerably tighter than a hot brew, because the ice in the vessel melts and dilutes the finished drink. Named roaster recipes are the place to start — Has Bean and Square Mile both publish iced V60 methods — and the principle is that you brew strong and let the melt bring you back to roughly drinking strength. Brewing a 1:16 recipe over ice simply gives you a weak, watery glass.
Do different brewers need different ratios? The ratio transfers between brewers as a strength lever; what changes is grind and flow. A 1:16 brew is a 1:16 brew in a V60 or a flat-bed brewer. What differs is how sharply the brewer responds — a fast-draining cone like the V60 shows up every adjustment immediately, so you will notice ratio changes faster there than in a slower, more forgiving bed. Start from the same number and let the brewer tell you how much to move.
Does the material of my dripper affect the brew temperature? It can. The Hario V60 Ceramic 02 requires preheating, precisely because a cold ceramic cone absorbs heat from the slurry as you pour. In a four-degree SCA window of 92–96 °C, losing heat to the brewer is enough to push you below target. Rinse and preheat the cone before you add coffee — it is a free fix, and it is the reason temperature-stability advice and brewer material are usually discussed together.
Is 55 g/L the same as 1:18? Approximately — 1:18 works out to about 55.6 g/L, which is commonly rounded down to 55 g/L. They describe the same brew strength, and the SCA Golden Cup band of roughly 50–60 g/L ±10% spans about 1:16.7 to 1:18. The reason to keep the decimal in mind is purely diagnostic: if you measure your own brew at around 55 g/L and someone tells you that means 1:15, you now know which figure is wrong.