Espresso Tamper and Distribution Tools UK: What Actually Improves Your Shot
A UK guide to espresso tampers and distribution tools, covering WDT, tamper sizing, levelling and whether each tool is worth buying.
Espresso Tamper and Distribution Tools UK: What Actually Improves Your Shot
Between grinding the coffee and locking in the portafilter sits a step that decides whether the shot works: preparing the puck. Uneven grounds mean water finds a path of least resistance and races through it, over-extracting one part of the bed while barely touching the rest. That is channelling, and it is the most common reason a home espresso tastes both bitter and sour at once. This guide is based on desk research: manufacturer specifications, retailer listings, and owner reviews on Amazon UK and specialist coffee retailers rather than first-hand testing. Below you will find a shortlist, a comparison table, notes on the main tool types, and an honest assessment of which ones actually earn their place.
Quick Picks
| Best for | Tool | Why we picked it |
|---|---|---|
| Biggest improvement per pound | A WDT tool | Breaks up clumps in the basket; the single most effective puck-prep upgrade. |
| Best tamper | Normcore V4 spring-loaded | Consistent pressure without needing to judge it by feel. |
| Best value | A cheap needle WDT and a well-sized flat tamper | Covers the essentials for very little money. |
Comparison Table
| Tool | What it does | Worth it? | Approx price |
|---|---|---|---|
| WDT tool | Stirs fine needles through grounds to break clumps | Yes — the clearest improvement | around £10–£40 |
| Calibrated tamper | Applies a consistent pressure via a spring | Yes, especially for beginners | around £40–£80 |
| Flat tamper (plain) | Compresses the puck level | Essential, but cheap ones work | around £15–£40 |
| Distribution tool / leveller | Spins to level the grounds before tamping | Optional — overlaps with WDT | around £20–£50 |
| Dosing funnel | Stops grounds spilling and aids WDT | Cheap and genuinely handy | around £10–£25 |
| Puck screen | Metal mesh on top of the puck | Marginal — mainly aids cleanliness | around £10–£20 |
Prices are indicative and were correct at the time of writing. Always check the current price before you buy.
Get the Tamper Size Right First
Before anything else: your tamper must match your basket. A tamper that is too small leaves a ring of uncompressed coffee around the edge, which is precisely where water will channel. This is the most common equipment mistake in home espresso, and no technique compensates for it.
Most domestic machines use a 58mm group, and the correct tamper is usually 58.3mm to 58.5mm — very slightly under the nominal size so it fits inside the basket wall rather than jamming. Many machines ship with a cheap plastic 53mm or 51mm tamper regardless of basket size, and some ship with an undersized one for the basket supplied.
Common sizes:
- 58mm group (most prosumer machines, Gaggia Classic, Rancilio) — buy 58.3mm or 58.5mm
- 54mm (Breville/Sage Barista range) — buy 53.3mm or 54mm depending on the basket
- 51mm (some Delonghi and entry machines) — measure, as these vary
Measure the internal diameter of your basket at the top rather than trusting the machine’s stated group size. Replacing a badly sized tamper often improves shots more than any other single purchase.
WDT: The Tool That Actually Matters
WDT stands for the Weiss Distribution Technique, named after John Weiss who described it. The tool is simply a handle holding several very fine needles — typically 0.3mm to 0.4mm — which you stir gently through the dry grounds in the basket before tamping.
The reason it works is clumping. Modern grinders, especially conical burr ones, produce clumps of statically-bound coffee. A clump is denser than its surroundings, so water avoids it and races around it. Tamping does not fix this: it compresses the clumps and the gaps together, preserving the unevenness. Stirring with fine needles breaks the clumps apart and redistributes the grounds, which is why WDT produces such a visible improvement in shot consistency.
Practically: stir gently in a spiral or figure-of-eight, reaching the bottom of the basket without scraping hard, for about ten to fifteen seconds. Do not overdo it — excessive stirring compacts fines at the bottom of the basket, which causes its own problems. Then settle the bed, level it, and tamp.
Needle gauge matters. Thicker needles (0.5mm+) push grounds around rather than passing through them, doing less to break clumps. Look for 0.3mm to 0.4mm. Beyond that, an expensive WDT tool does nothing a cheap one does not; several people simply use acupuncture needles set in a cork. This is the rare case where the cheapest option is genuinely competitive.
If you buy one thing from this article, buy a WDT tool.
Tampers: Flat, Convex, and Calibrated
Flat tampers are the default and the right choice for almost everyone. They produce a level puck, which is what you want.
Convex (slightly domed) tampers have advocates who argue the curve helps seal the puck edge. In practice the difference is small and disputed, and a flat tamper with good technique is at least as good. Not worth chasing.
Calibrated or spring-loaded tampers click or give way at a set pressure, commonly around 15kg to 30kg depending on the model. Their value is consistency: rather than judging pressure by feel, you press until it clicks. For a beginner this removes a variable while you learn everything else.
It is worth knowing that tamping pressure matters less than people think, provided it is consistent and the puck is level. Once the coffee is compressed beyond a certain point, additional force does very little — the grind size and the evenness of the bed dominate. What actually causes trouble is a tilted tamp, which creates a thin side and a thick side and guarantees channelling. Tamping level is the skill; tamping hard is not.
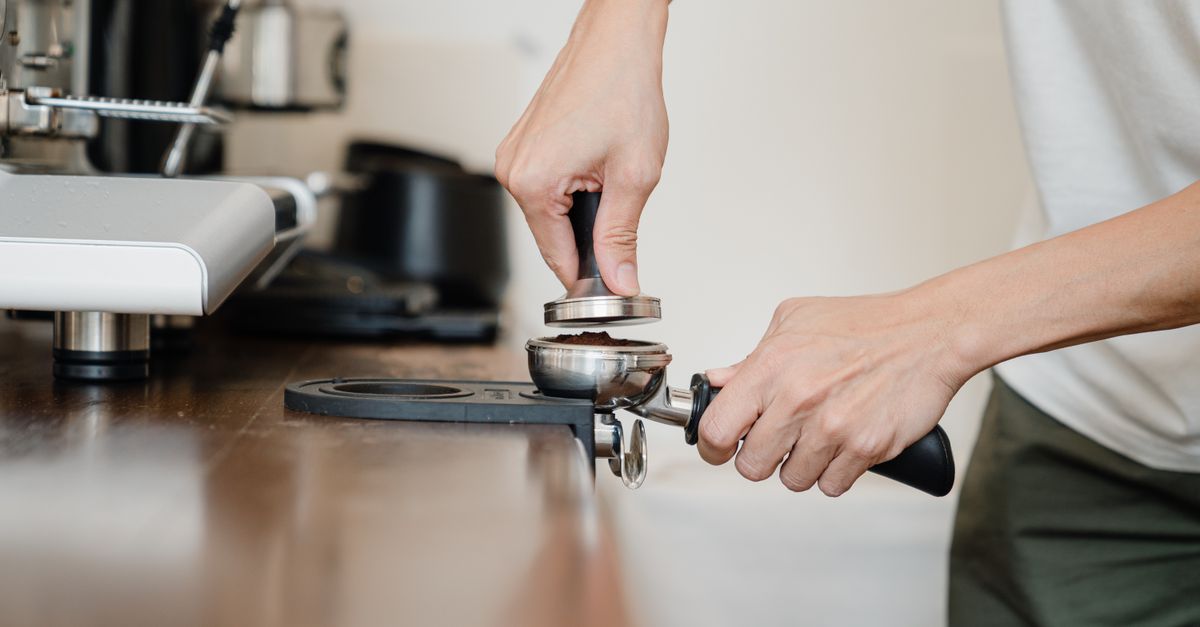
A practical tip: tamp on a corner of the worktop with your forearm vertically above the tamper, so you are pressing straight down rather than at an angle. A tamping mat protects the surface and helps you keep the portafilter steady.
Distribution Tools, Funnels and Puck Screens
Distribution tools (sometimes called levellers or OCD tools) are discs with angled fins that you place on the basket and rotate, sweeping grounds into a level bed at a set depth. They produce a tidy, flat surface quickly.
The honest assessment: they level the surface well but do relatively little to fix clumping below the surface, which is the actual cause of channelling. A WDT tool addresses the deeper problem. If you have both, use WDT first and the distributor after as a levelling step. If you can only buy one, buy WDT. Note also that a distribution tool must match your basket diameter just as a tamper does, and its depth usually needs adjusting to your dose.
Dosing funnels are simple rings that sit on the portafilter, keeping grounds from spilling over the sides and giving you room to do WDT without making a mess. Cheap, and genuinely useful — one of the better small purchases.
Puck screens are thin metal mesh discs placed on top of the tamped puck. Claims about improving extraction evenness are contested and probably modest. What they reliably do is keep the group head cleaner, which reduces how often you need to backflush and scrub the shower screen. Worth having for convenience rather than flavour.
What Actually Fixes Channelling
Taken together, the priority order for improving espresso consistency is roughly:
- A decent burr grinder. No puck-prep tool compensates for a grinder that cannot produce a consistent particle size. If you are using a blade grinder or pre-ground coffee, that is the thing to fix.
- A correctly sized tamper. Fix any size mismatch immediately.
- A WDT tool. The best value improvement available.
- Scales, and a consistent dose. Weighing in and out is what makes anything else repeatable.
- Consistent, level tamping. Technique rather than equipment.
- Everything else — distribution discs, puck screens, bottomless portafilters, fancy tampers.
A bottomless (naked) portafilter deserves a mention here as a diagnostic rather than a tool: with the spouts removed you can watch the underside of the puck during extraction. Even, uniform flow means good preparation; a jet squirting sideways is channelling, visible in real time. It is an inexpensive way to learn what your puck prep is actually doing, which no amount of reading replaces.
A Repeatable Puck Prep Routine
Tools only help if you use them the same way every time. A routine that works with the equipment above:
- Grind straight into the portafilter with a dosing funnel fitted, so nothing spills over the rim.
- Weigh the dose. Whatever your basket is rated for — commonly 18g in a 58mm double — hit it consistently. Puck prep cannot compensate for a dose that wanders by 2g between shots.
- WDT for ten to fifteen seconds. Stir gently in a spiral, letting the needles reach the base of the basket without gouging. You are breaking clumps apart, not whipping the coffee.
- Settle the bed. Tap the portafilter gently on the mat once or twice, or give it a light shake to level the surface. Avoid heavy banging, which drives fines downward and compacts the base unevenly.
- Level, then tamp. Place the tamper flat, check by eye that it sits parallel to the basket rim, and press straight down with your forearm vertical. Moderate pressure is enough; consistency and levelness are what matter.
- Wipe the rim of grounds so the portafilter seats cleanly against the gasket, which prolongs gasket life and prevents leaks.
- Lock in and brew immediately. A prepared puck sitting in a hot group head starts to dry and channel.
Two habits make the biggest difference over time: weighing in and out, and changing one variable at a time. If a shot runs too fast or too slow, adjust the grind and leave everything else alone until you see what that did.
Cleaning and Looking After the Tools
None of this equipment is demanding, but a little care helps. Wipe the tamper base with a dry cloth after use rather than washing it — many tampers have wooden or resin handles that dislike prolonged water, and coffee oils build up on a wet base. Rinse WDT needles under warm water and let them dry; they are fine and bend easily, so store the tool where it will not be knocked about. Dosing funnels and distribution tools can be rinsed and dried normally. Puck screens need a periodic soak in a backflush detergent, as they clog with oils and eventually restrict flow if neglected.
FAQ
What size tamper do I need? Match it to your basket, not to a generic assumption. Most machines with a 58mm group take a 58.3mm or 58.5mm tamper — very slightly undersized so it sits inside the basket wall. Sage/Breville machines generally take 53.3mm or 54mm, and some entry-level machines use 51mm. Measure the internal diameter of your basket at the top rather than trusting the specification, because many machines ship with a tamper that does not properly match the basket supplied with them.
Is a WDT tool really worth it? It is the most cost-effective puck-prep upgrade available. Grinders produce static-bound clumps of coffee, and tamping simply compresses those clumps along with the gaps between them, leaving density variations that water channels through. Stirring fine needles through the dry grounds breaks the clumps up and evens out the bed, which noticeably improves consistency. Cheap tools work as well as expensive ones, provided the needles are fine — around 0.3mm to 0.4mm rather than thicker.
How hard should I tamp? Less critically than most people assume. Beyond a moderate compression, additional force changes the shot very little, because grind size and bed evenness dominate the outcome. What genuinely matters is that the tamp is level and consistent between shots — a tilted tamp creates a thin side where water rushes through, which is a reliable cause of channelling. If you struggle with consistency, a spring-loaded calibrated tamper removes the guesswork while you develop the technique.
Do I need a distribution tool as well as a WDT tool? No, and if you buy only one, make it the WDT tool. Distribution discs level the top surface of the grounds neatly but do relatively little about clumping deeper in the basket, which is what actually causes channelling. WDT addresses the underlying problem. If you own both, the sensible order is WDT first to break up clumps, then the distribution tool to level the surface, then tamp.